Cisco Modeling Labs (CML) 2.6, the current variation of our leading network virtualization platform, is lastly here. CML 2.6 provides rather a list of beneficial tools, with additions like Amazon Web Provider (AWS) Cloud release and a brand-new Upkeep mode for system admins
Nevertheless, I’m here to talk about the function I’m most delighted about:
CML 2.6 consists of a revamped Workbench that enables users to see several gadgets, tools, and configs in the very same view.
New functions within revamped Workbench consist of:
-
- a menu to include nodes to your work environment.
- a sidebar center to customize laboratory components.
- multi-select and right-click action menu s.
- keyboard faster ways.
- laboratory actions.
- a panes panel for a more versatile work space.
Continue reading for a thorough appearance inside the Workbench revamp readily available in Cisco Modeling Labs’ most current function release.
Inside the CML 2.6 Workbench revamp
Including nodes with– or without– a mouse
Including brand-new nodes into your work space is still a simple procedure, where you can drag and drop your picked kind of node onto the canvas. However prior to CML 2.6, the interactive drag menu was on the right-side menu. Now, it’s triggered by choosing the Include Nodes icon in the Workbench toolbar.
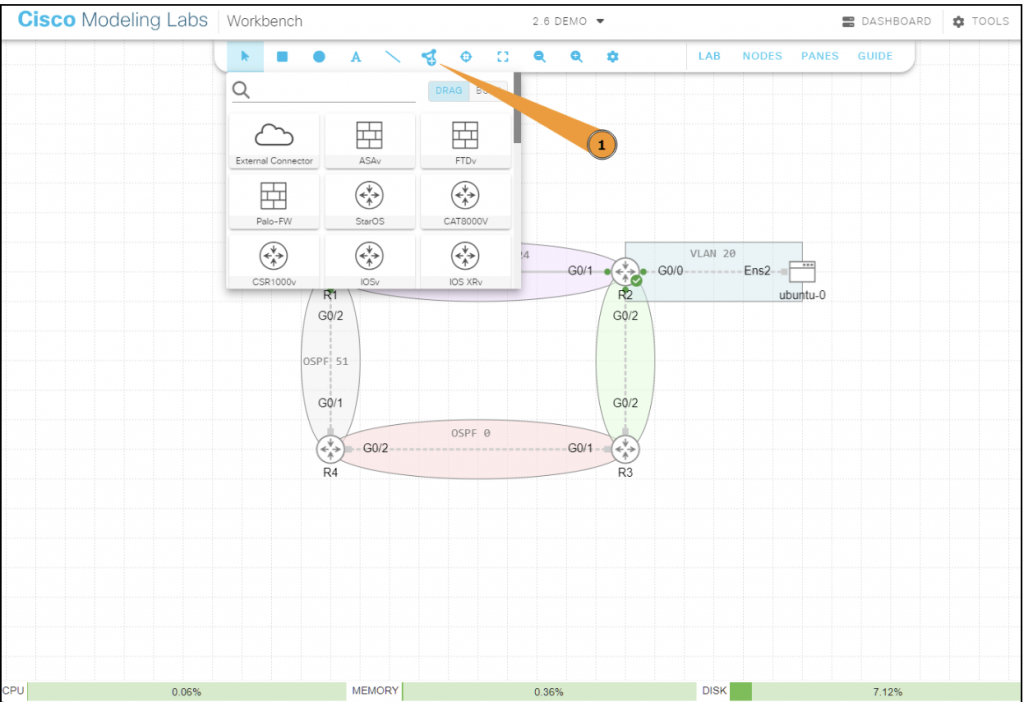
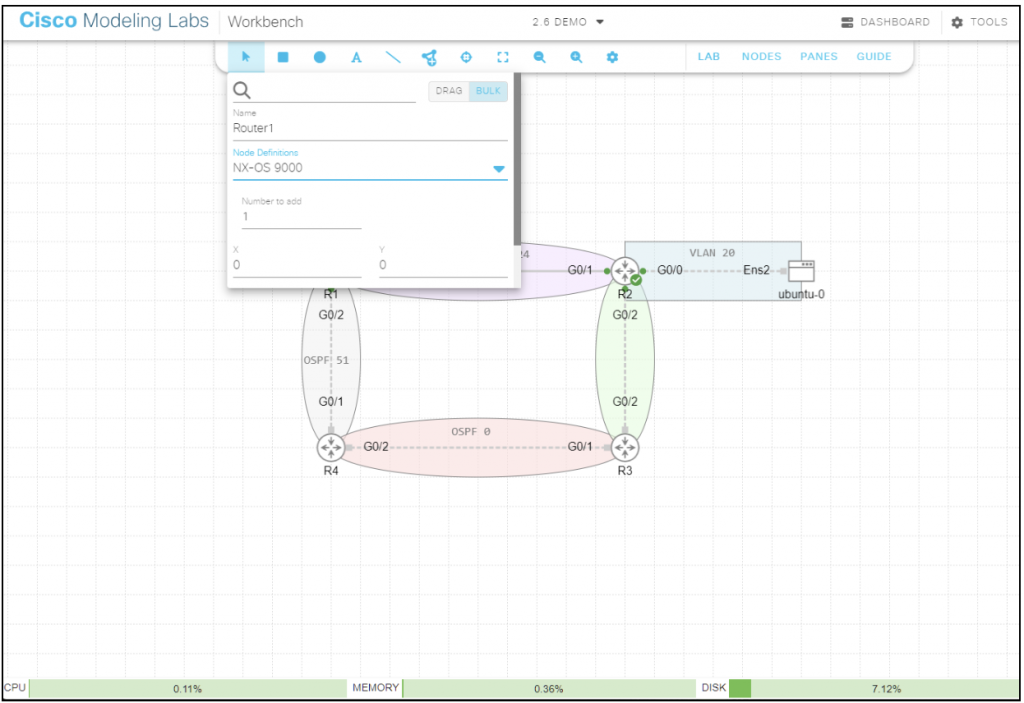
In addition to this conventional approach of including nodes, we have actually presented a new function called Bulk Include It is created with availability in mind, so you can include as numerous nodes as you require– utilizing just your keyboard, removing the requirement for a mouse.
Modifying components in the Sidebar
We have actually revamped the interface to supply a more structured and unified experience for users as they modify components within a laboratory. Now, in CML 2.6, the Sidebar acts as the single, combined center for altering all your laboratory components. Whether you wish to modify a node, link, or annotation, just pick it, and the Sidebar will show the pertinent modifying choices.
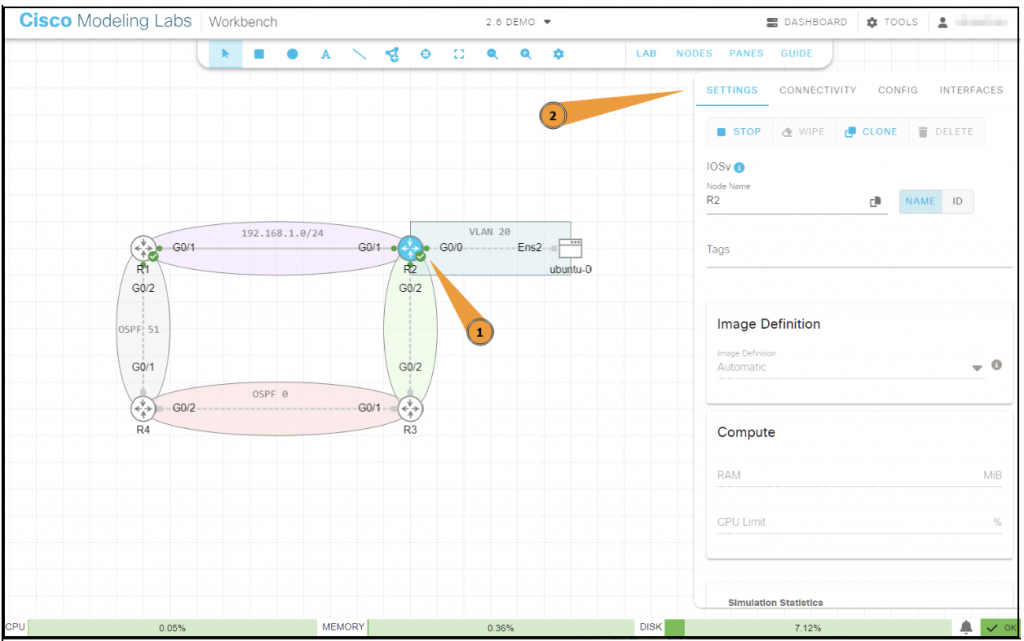
This structured method to handle your laboratory components gets rid of the requirement for the bottom panel to move in action to the Workbench state. In turn, you take advantage of a more concentrated experience. With this setup, you can keep your attention on the bottom pane while concurrently modifying the homes of a laboratory aspect utilizing the Sidebar.
Utilizing the Multi-select Action menu
You can trigger the Multi-Select action menu by choosing several components and right-clicking anywhere on the canvas. This action opens a Context-sensitive menu with an unique area for each aspect type.
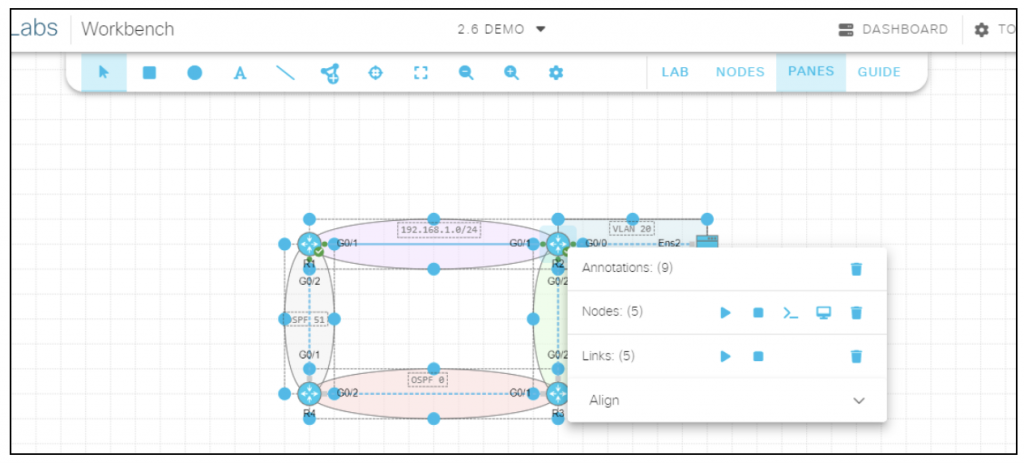
Within each area, you can carry out actions on the matching aspect type. Please note: the system presently does not confirm the credibility of an action. Likewise, when you pick several nodes, an Positioning area appears in the menu, offering choices to line up the picked nodes.
Utilizing the Right-click Context menu
The Right-Click Context menu shows when you right-click a kind of aspect: annotation, node, or link. This menu provides a list of actions particularly customized to the picked aspect type.

Note: the Right-click Context menu usually offers more actions for each aspect type compared to the Multi-select Action menu.
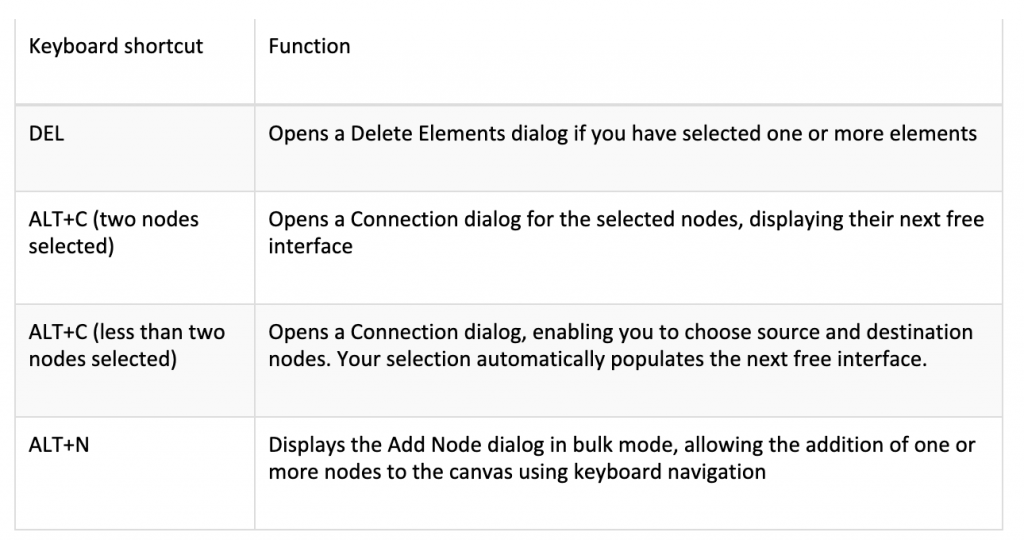
Keyboard faster ways
Laboratory Actions menu
You can discover the Laboratory Actions menu in the toolbar under the “LABORATORY” area. You can likewise trigger this menu by right-clicking the canvas while no components are picked.

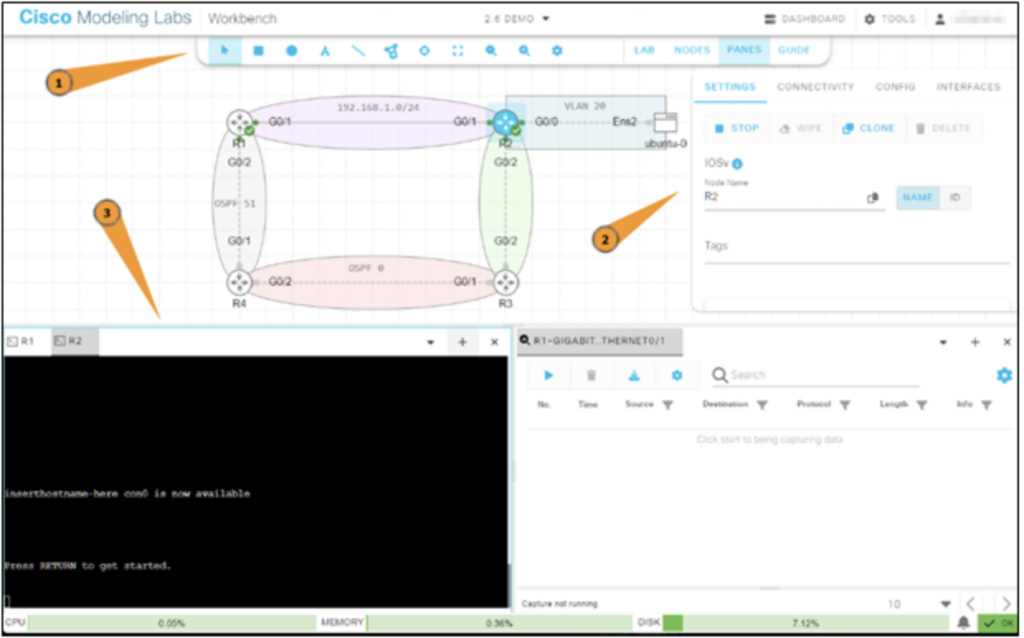
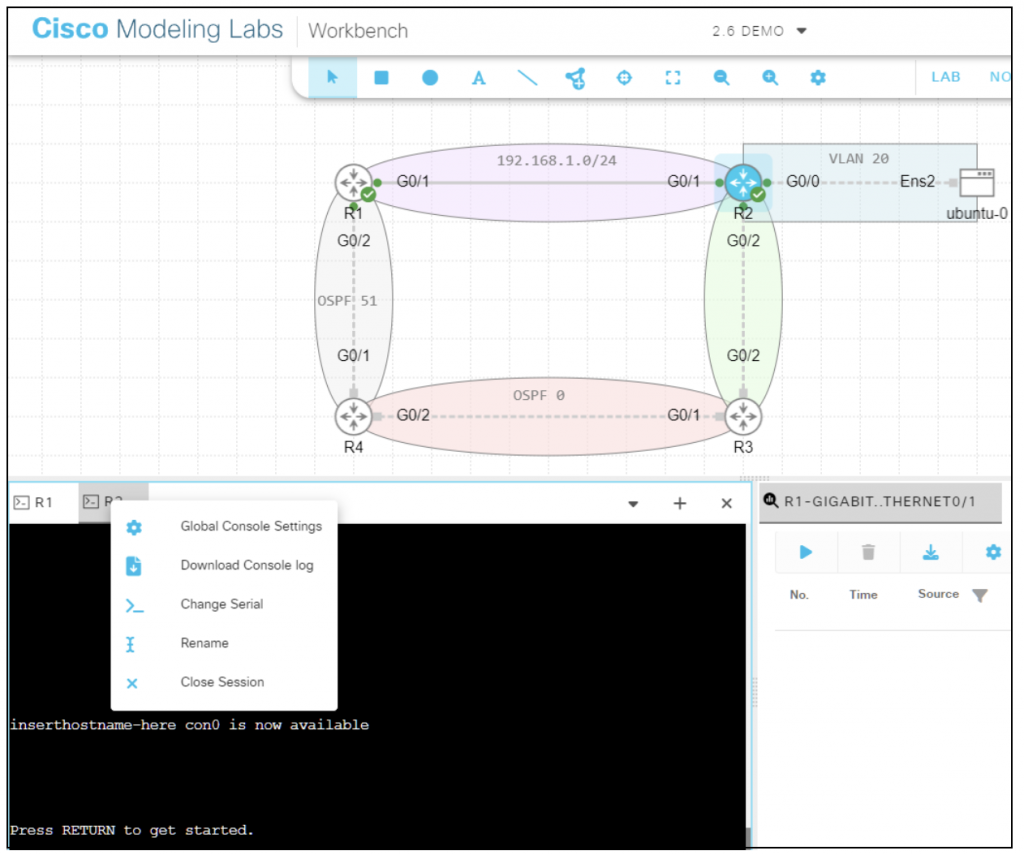
Panes panel
The Panes panel is a flexible tool created to provide you a versatile work space. For one, the Panes panel enables you to open several tabs, each hosting a Console, VNC, or PCAP session. You can likewise select how you wish to host tabs: in just one pane or throughout several. For example, you can have one pane consisting of an open console session while another runs a package capture.
What to remember when utilizing the Panes panel:
- One single pane is set by default, however you can include others by choosing the “+” icon.
- If you have more than one pane, you will see one pane highlighted with a blue square, which shows it will be the target for any brand-new sessions you open. (You can alter this by clicking in a various pane, which sets it as the brand-new target.)
To open a tab, just right-click a running link or node, and open the matching session for VNC, Console, or PCAP. As an included benefit, you likewise have the alternative to pick several nodes and concurrently launch several sessions, simplifying your workflow.
As Soon As you have a tab open, you can quickly rearrange it by dragging it from one pane to another. This drag-and-drop performance offers a simple method to arrange your work space according to your choice or requirement.
The panes and their particular tabs are created to keep their state on a per-browser and per-lab basis. This implies your plan of panes and tabs, in addition to the material within them, will stay as you set them (even if you browse away or close your web browser), offering a relentless workplace.
Each pane tab is geared up with a context menu, which you can access by right-clicking the tab. This context menu consists of choices and actions that relate particularly to the kind of tab, providing you a set of pertinent controls right within your reaches.
To make your work space much more personalized, you can relabel tabs to show their material or function. You can either double-click on the tab, which will enable you to modify the name straight, or right-click on the tab and select the Rename alternative from the context menu.
The Carrot Down icon related to each pane (see listed below) acts as an entrance to a menu. This menu shows a searchable list of all presently open sessions, making it simple for you to browse straight to the session you require.
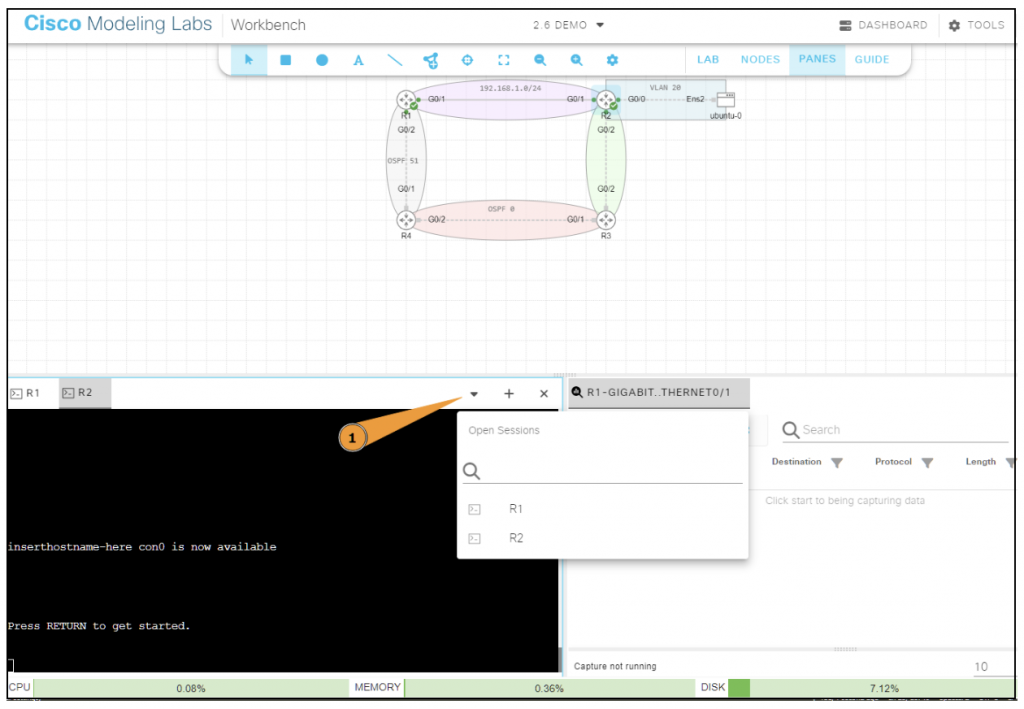
To assist you track the relationship in between your tabs and their involved components, you can pick a tab to see its matching node (or link) on the canvas. This implies you can immediately see which parts of your laboratory you are presently communicating with through your session.
If you require more canvas area momentarily, you can conceal and reveal the Panes panel by clicking the “PANES” toolbar alternative.
Till next time …
I hope this short article has actually stimulated your interest in CML v2.6, the most recent variation of Cisco Modeling Labs. For more details on what’s brand-new in Cisco Modeling Labs 2.6, see the release notes You can likewise view this current demonstration for an assisted walkthrough of the brand-new CML 2.6 updates.
I aspire to find out about your experiences as you provide the brand-new Workbench a spin. Please do not hesitate to share your feedback in the remarks area listed below. Till next time, pleased labbing … and take pleasure in checking out all that this upgrade needs to provide!
Get In Touch With the CML– Personal Neighborhood on the Cisco Knowing Network.
Follow Cisco Knowing & & Certifications
Twitter | Facebook | LinkedIn | Instagram | YouTube
Usage #CiscoCert to sign up with the discussion.
Check out next: “Start with Terraform and Cisco Modeling Labs” by Ralph Schmieder. Check out now
Share:
.